
By Brandon Buck
When we get handed the reigns for digital marketing, whether with a new client with a new product, or an existing client trying to revitalize their existing campaign, we always make sure there are a few tools ready to go. In the past, I’ve written about mis-en-place, the French culinary technique of setting up everything you’ll need before you start cooking. For digital marketing, this is not only important to launch a successful ad campaign; it’s essential because it ensures that the platforms have all the data they need to work with. Setting things up sooner than later is crucial because the data is only available after it’s enabled in your account. In fact, I encourage our clients to take a lot of the steps below even when we are not handling their digital marketing campaigns, just to be sure that if we have the data at our disposal if we are to need it.
Some implementations of data tracking require access to website development, so there are usually steps that need the webmaster’s involvement. Fortunately, most platforms make the process as easy as possible and often just require account permissions to sync together. So to keep things simple, we’ll highlight only a few of the campaign settings I like to set up in Meta. Of course, it’s important to also ensure you have the appropriate disclosures, disclaimers, and opt-in options available on your website.
Meta Pixel
Once you have installed the Meta Pixel onto your site or integrated with your service (ie. via Shopify app or plugin with WordPress), here are a few of the settings to immediately enable.
Turn on automatic advanced matching
Enable all options (email, phone number, first and last name, gender, city, state, ZIP/postal code, country, date of birth, external ID).
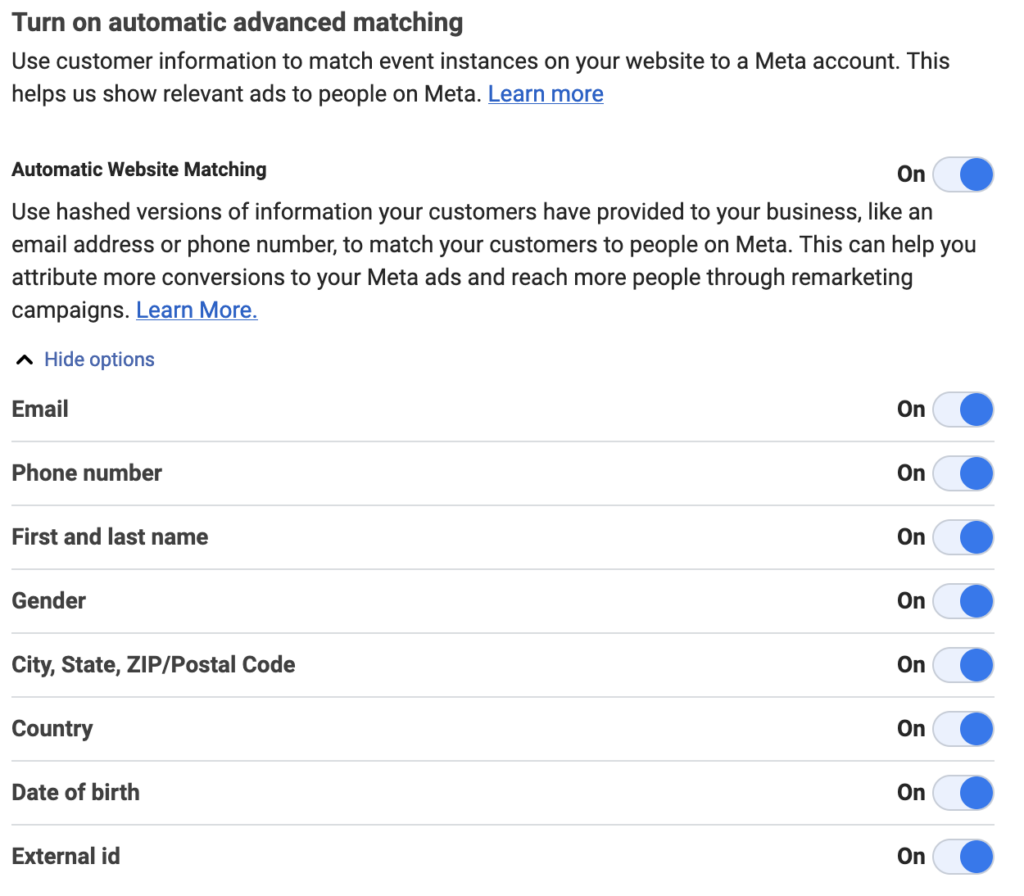
Even if your site doesn’t include all of this information (birthdate and gender are not typical inputs for most of our clients), Meta will take what your users have provided.
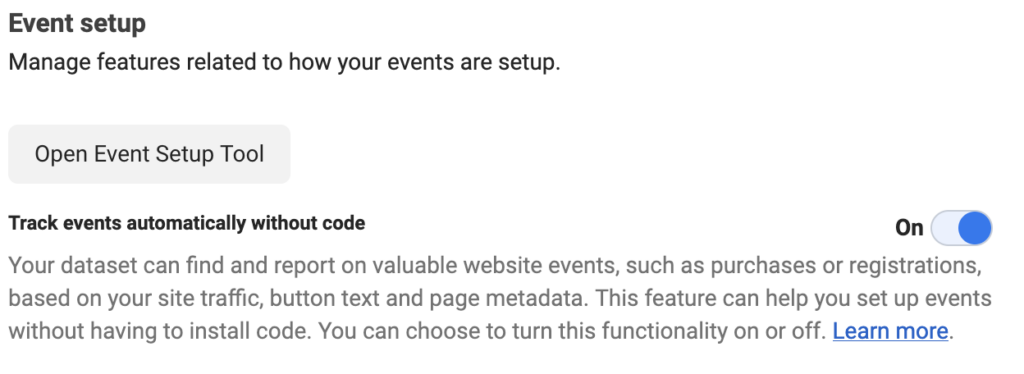
Track events automatically without code
Without this option, you’ll have to manually set up, adjust, and check all actions on your site are syncing correctly with Meta- like form submissions, viewing videos, etc. To do so manually will take a lot of time and will need a lot of hands-on development work to set up, but Meta can otherwise automatically track engagement on your site and provide you options for conversions (ie. users that are on your site for more than 30 seconds and watch a video to completion).
Conversions API
This one can be a bit tricky, but if you’re using a standard platform like WordPress or Shopify, these integrate very easily. Conversions API is Meta’s more thorough data system that tracks interaction and engagement via server activity. For the standard Pixel/tag tracking, all interaction is from the data that is loaded onto a user’s device – when a user loads a webpage, they load your tag as well. But some of this can be limited, and a lot is now not tracked by default (particularly on iOS devices after Apple disabled all pixel tracking). Server-side tracking is based on data that had to be delivered to the user’s device, which can’t be excluded from a user blocking their browser’s cookies. It’s a bit like a customer saying they didn’t eat three plates of French fries versus personally delivering three plates of French fries to their table.
In the case of Shopify and Meta, there’s an additional tag setup to know that all data is fully being synced between the two platforms.
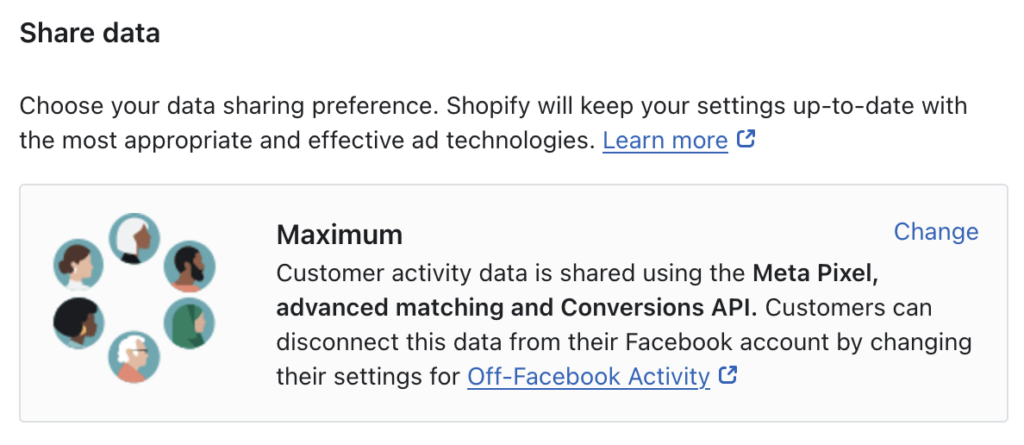
In App > Facebook & Instagram > Settings > Share Data, you’ll want to select “Maximum” as the option to ensure the Meta Pixel and Conversions API are sending all data back to Meta.
Once again, depending on the terms that you have set for your website, these are all good measures you should have in place from the very beginning of launching your digital marketing campaign. For Meta, the more data you can provide, the better your campaign outcomes will be.