By Kevin Wu
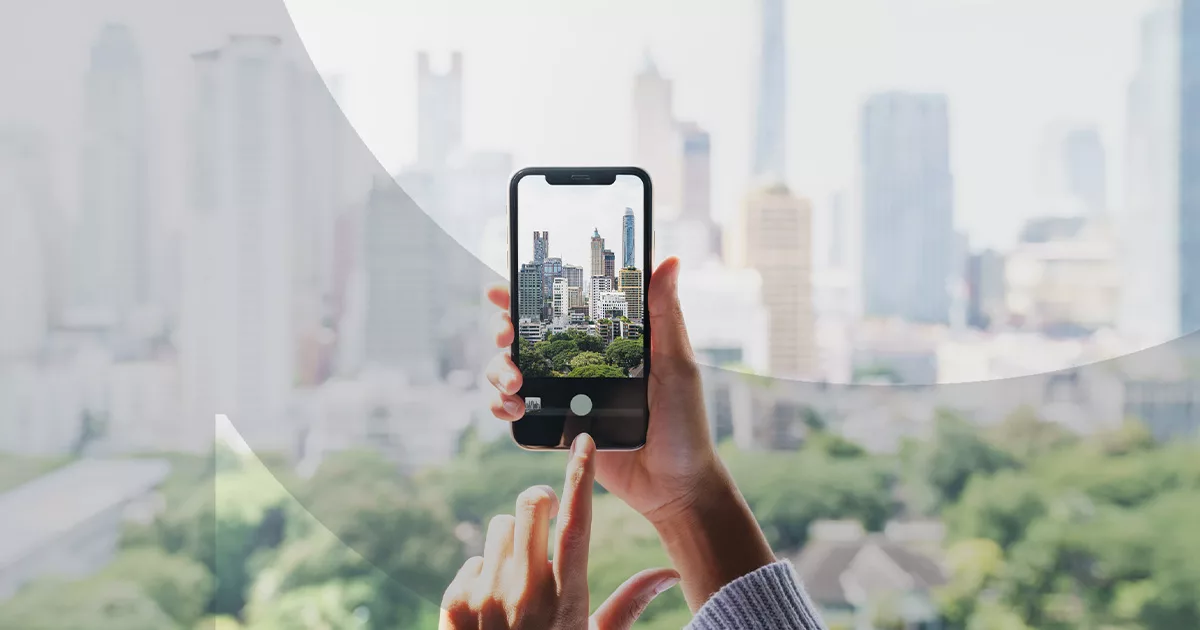
The same device you use for Instagram selfies and cat photos is one of the most powerful and accessible cameras in the world for content creation. The bulky array of lenses on the back of your phone, no matter iPhone or Android, can produce photos nearly as good as professional DSLR and mirrorless cameras. The secret lies not only in hardware improvements but the software algorithms as well. Smartphones today don’t just take photos; instead, they help process and edit photos before you even press the shutter button, producing images that exceed the hardware’s original capabilities.
Making the most of this versatile and accessible tool can directly improve the quality of your social media content without hiring a photographer or paying for a new camera. Here are some tips to get started.
Before You Start
To improve your smartphone photos, here are some preparations to make before pressing that shutter button.
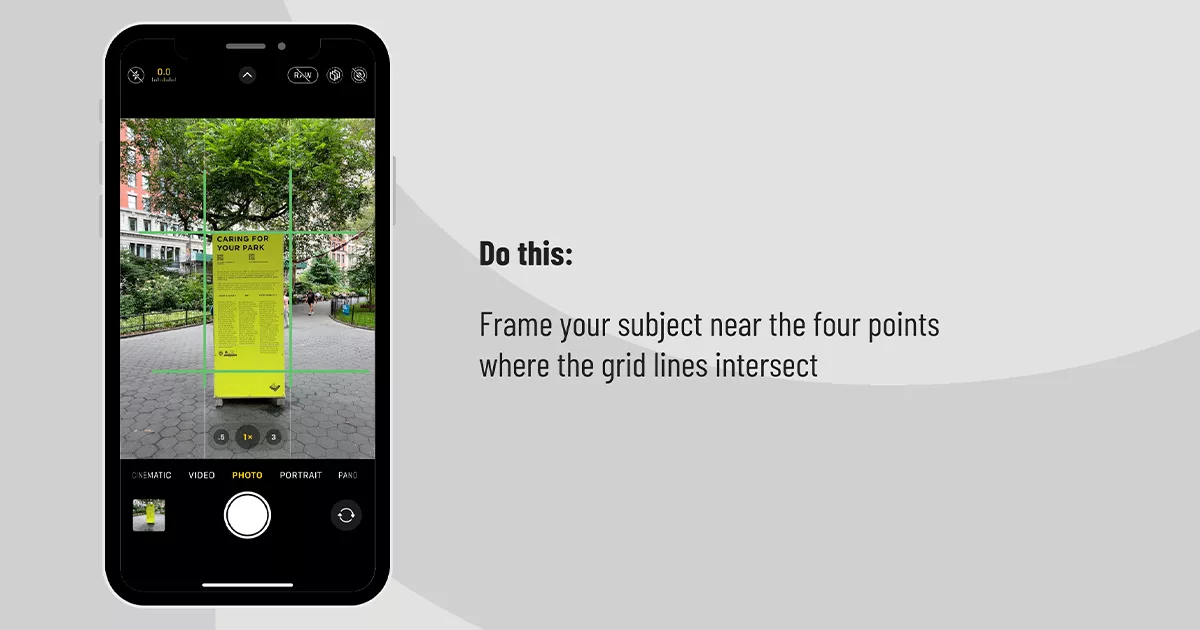
• Go to the camera settings on your phone and turn on the gridlines. They will help you to better compose the photo.
• Wipe your phone camera clean. Smudgy fingerprints on lenses will cause the image to be blurry and foggy, especially with strong lighting.
• Use the default camera app on the phone to take photos. The default app usually has the most sophisticated algorithm to process the photo and outputs with the highest quality. You can then use third-party apps like Lightroom, Snapseed, or VSCO to edit the photos to your liking.
Before You Shoot
Now that you’ve opened the camera app, it’s time for some trial and error.
• Find a setting that is well-lit, either with ample natural light or interior lights. Make sure nothing is overexposed (blindingly white) or underexposed (pitch black) in the viewfinder of the camera app.
• Move around a bit to find your favorite angle. Don’t be afraid to experiment.
• Frame your subject near the four points where the grid lines intersect. This is one of the simplest ways to achieve a decent composition and also ensures the subject won’t be awkwardly cut off when the photo is posted.
• Avoid zooming in. This will crop into the photo and result in a more pixelated image. Instead, try using different lenses on your phone (e.g. 0.5x, 3x) for the best image quality. Some phones also come with special features such as macro mode on different lenses. Again, experimenting and taking shots from different angles never hurts.
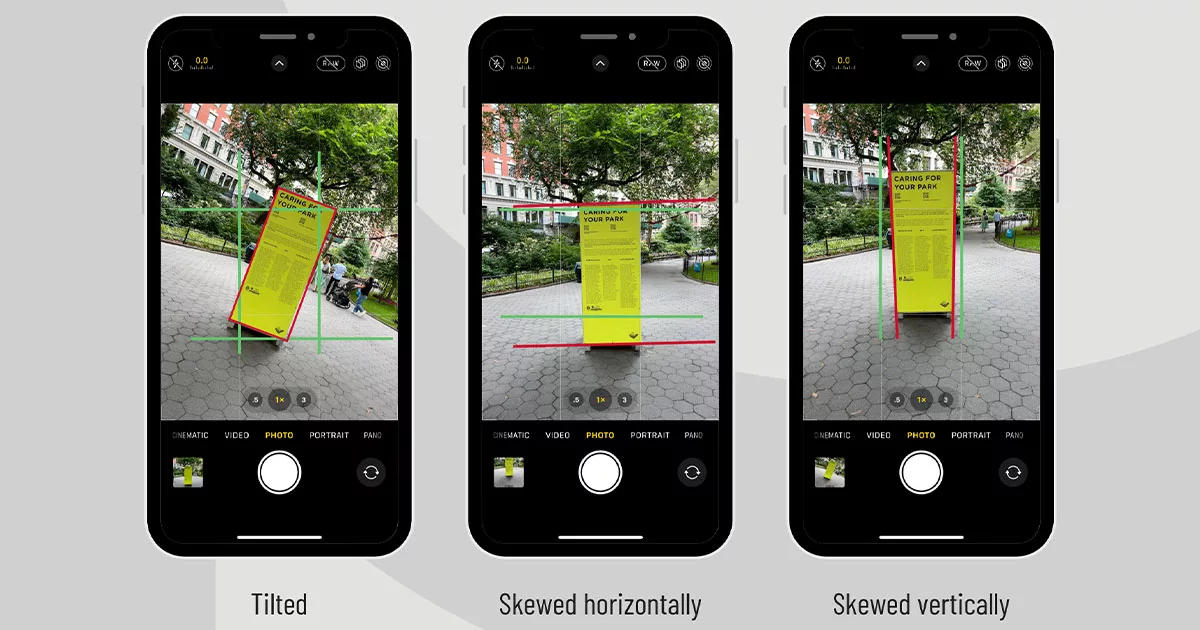
• Align the frame with the gridlines so that the photo is straight on at least one axis, hence avoiding a tilted or skewed photo that screams unprofessional.
Before You Post
The abundance of social media platforms allows for a diverse social media presence for your brand: Instagram puts the image at center stage; Twitter and Threads aim for a balance between text and visuals; TikTok is…TikTok. Understanding each platforms’ limitations and features and editing your photos accordingly is important for taking full advantage of how they present visuals to an audience. Using Instagram as an example, it’s not necessary to use square photos as the platform accepts a range of aspect ratios. Before you post to Instagram, X (formally Twitter), Facebook, and LinkedIn, make sure you carefully review their posting guidelines.
Before You Call it a Day
Don’t let photos get buried in your photo library like a random screenshot. Treat them as handy and reusable brand assets with zero royalty and copyright concerns. The best way to organize them is to archive all photos and sharing it with your team. The easiest way to do that is by creating a folder in a cloud drive like Google Drive, Dropbox, or Microsoft OneDrive. Upload the selected photos and organize them into folders after each posting so they can be saved for future use. Also make sure to have a clear naming system for the folders so the photos can be easily searched.